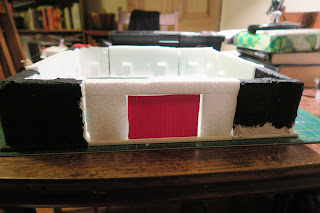
But I saw recently that someone in the myriad and various Facebook groups that I follow had been making walls out of polystyrene foam, and his work inspired me to finally get down to it and make something in the same spirit for myself.
 |
| Here's what you'll need, not including sticking plasters and alcohol of the consumable variety... |
As usual I'm only using materials that are cheap and easily available, and the polystyrene foam was something that I fished out of a dumpster, so that effectively cost me nothing. But be careful if you're going to take this course of action to make sure the waste isn't either contaminated, harmful or getting to it involves some kind of trespassing - if in doubt with the first two points, then leave it well alone, and in the case of the third, ask permission.
 |
| "Someone must present 'wall'..." |
I attached the wall sections to the EPVC bases using grab adhesive, making sure that they married up roughly in height. You can be as accurate or lax in this respect as you like, and I chose the latter because I wanted the walls to look more rough and ready than uniform in nature.
 |
| Support network... |
 |
| Getting plastered... |
Once the grab adhesive had dried, I added a thick layer of filler applied with a small pallet knife, using Milliput to fill in the areas where the polystyrene was too deeply pitted for the effect that I wanted. My take on this was to go in strong at this stage, not bothering to smooth the filler out too much once it was covering the polystyrene for the sake of making it look rough and like decaying plaster or concrete.
As before, you can be as rough or smooth with this as you like, based on what you want to end up with, even waiting for the filler to set a little and then adding texture with something like a roller or other materials if that's your thing.
I chose to add a layer of a paste made of filler, emulsion paint and budgie grit to the bases, as I do with most of my terrain, in order to fill in the gaps between the wall and the base as well as to simulate dirt, rocks and other detritus building up against them over time.
 |
| Dis town, is comin' like a ghost town... |
I didn't seal the walls with anything like PVA glue or Modge Podge, as I've found in the past that this smooths the texture of the filler and takes away from the effect that I was after (which may or may not be the case for yourself), and so I used an undercoat of black acrylic paint instead. This does mean that you'll need more than one coat and to go back to pick out missed spots, as the filler's pretty thirsty to begin with, but perseverance pays off in the end.
 |
| It's hip to be square. |
From there I painted everything in a slate-coloured emulsion, followed this with a dry-brush of a medium and then a light grey, then finally a lighter circuit with white to finish off, and I'm very pleased with the results.
All that remains is to add some colour in the form of graffiti or hazard signs and finish off the removable door for the gate section, then wash, varnish and done.
I already have a second set in the works that I plan to basecoat in brown and them stipple or sponge white to create a white-washed stucco effect.
This is a quick and easy build that seems to create effective results, and the fundamentals of which can be applied elsewhere without much alteration either.
Let me know what you think, either with a comment below, or a comment and share on social media.
See you next time.


No comments:
Post a Comment